Projects
Any time you upload data to Wildlife Insights, you’ll upload data to a project. A project is a group of (or a single) camera deployments with a defined objective and methods.
The project workspace is where you manage, edit and review metadata related to locations, deployments and data sharing. Navigating the project workspace is similar to navigating the organization workspace:
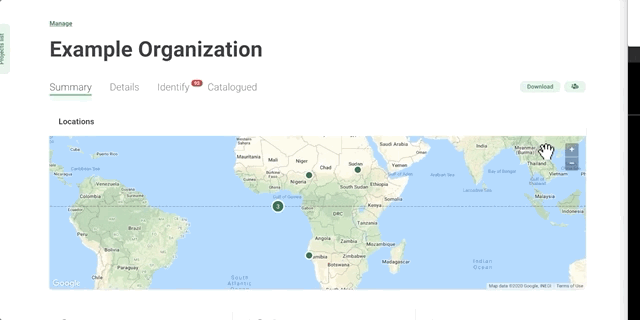
Summary tab: Displays a map of all camera deployments and an overview of data within that project. Summary statistics are typically updated every 24 hours.
Details tab: Set and edit project details, including the project name, objectives, data licenses, embargo time, sensor layout, and options to delete human images. You can also add and edit Subprojects (optional), Camera Deployments (required) and Locations (required).
Identify tab: View all images uploaded to Wildlife Insights through the web-based upload. These images have passed through the AI model and are ready for a user review. You’ll see the project’s images here and can filter by deployment, species and blanks.
Catalogued tab: View images that have been reviewed and verified by a user.
Uploads tab: View all of your uploads and review the status of your image uploads.
Download button: Easily download all the data from the entire project by clicking this button and selecting Request data.
User Permissions button: Invite users to join your project.

Create and Edit a Project
To create a new project, you can either:
- Use the Projects List (see the screenshot below on the left for an example):
- Click the green Projects List tab on the left side of the screen.
- Select the Add new button at the bottom of the tab.
- Select New project
- From the Manage page (see the screenshot below on the right for an example)
- Navigate to the homepage from anywhere in the platform by clicking on the Manage link at the top of the page.
- Once on the homepage, click the green Create button underneath the large #1.
- Select New project


Then fill out the form, making sure to fill out all required fields. You can return at any time to edit any of these fields described below:
- Organization*: The organization that owns the project. You can reassign a project to a different organization if you have an owner role in both the current and the new organization.
- Initiative: Share your project with other organizations through an initiative. You must have an Initiative Owner or Editor role to assign a project to that initiative.
- Project name*: The full name of your project.
- Website: If your project has a dedicated website, you can enter it here. Please enter websites with http(s)// at the beginning. This website will be displayed on the public project page.
- Project short name*: A short name for your project. This name will be used for display purposes in Wildlife Insights.
- Project type*: There are two types of projects that you can create in Wildlife Insights: Image or Sequence.
- Project Admin*: The name of the project administrator
- Project Admin email*: The email of the project administrator.
- Focal country*: The country where the project is located. If the project operates in multiple countries, please select here the name of the country where the project is coordinated from.
Additional countries: Additional countries where the project operates. - Start date*: The start date of your project.
- End date: The end date of your project. You may leave this empty if your project is ongoing.
- Metadata license*: Assign a license to the metadata (i.e., identifications, locations, project details) in your project. You may select from standard Creative Commons licenses: CC0, CC BY.
- Photos license*: Assign a license to the images in your project. You may select a standard Creative Commons license: CC0, CC BY, or CC BY-NC.
- Embargo: Projects can be embargoed for up to 48 months from the date of entry into Wildlife Insights. You may request an extended or indefinite embargo (i.e., private project status) if your project meets certain legal or cultural requirements.
- Objectives*: State the objectives of the project.
- Credit line: If you would like to specify the individuals or organizations in the citation generated by Wildlife Insights, enter their names in this field. Please enter their names in this format: Last name, First and Middle name initials. If you do not enter anything, credit will go to the Project admin.
- Acknowledgements: If you would like to acknowledge contributors to the project, please enter their information in this field. This information will be made publicly available.
- Project species*: Select whether your project focuses on a single or multiple species. If it focuses on individual species, select which species in the Project Species Individual field.
- Project individual animals: If your project focused on marked individuals (or identified individuals) in a population, please choose Yes.
- Project sensor layout*: Select the sampling layout that most closely represents your cameras.
- Project sensor cluster*: If your cameras were set up in clusters or pairs, please choose Yes
- Project sensor method*: Select if your cameras were set up to trigger by sensor detection, time lapse or both.
- Project blank images removed*: If your dataset includes blank images, please choose Yes. Note: Apart from legacy datasets, Wildlife Insights only accepts complete datasets. Please submit data, including all blanks.
- Project bait use/type: If your project used baited cameras, please choose Yes. Any selection made here will automatically fill in the Deployment Bait Type field. If project bait use=No, all deployments within that project must have a Bait Type= None.
- Project stratification/type*: Record if your projects were stratified across different zones. For example, a stratum may be a protected area vs. a non-protected area.
- Automatically delete the photos identified with humans: Select this option to delete images of humans from your project.
- Count is optional: Select this option to make animal count optional and not display it while reviewing images.
Project types
Data about the animals detected by the camera traps can be recorded in one of two ways: by image or by sequence. You can set how you’d like to record data when the project is created.
Note: Once a project type is selected, it cannot be changed.
Image projects
- Image projects record data for each individual image. Each image is associated with an identification, which Wildlife Insights assumes to be correct after the image is reviewed/edited.
- For example, let’s say a series of 10 images is captured within 60 seconds. There are two armadillos walking past the camera. Five images show one armadillo, three images show two armadillos, and two images are blank. In an image project, you would tag the images according to what is in a single image. That’s to say, five images would be tagged with one armadillo, three images would be tagged with two armadillos, and two images would be tagged as blank.
Sequence projects
- Sequence projects record data for a sequence of contiguous images taken within 60 seconds of each other. One identification (which could be of multiple animals) is assigned to the entire sequence of images. Group size is also a key variable for a sequence (how many animals are captured throughout the series of images in the sequence). If there are two or more species in a sequence, each can be recorded separately within the same sequence and with its corresponding group size.
- For example, let’s say a series of 10 images is captured in 5 minutes with less than 60 seconds between each image. There are two armadillos walking past the camera. Five images show one armadillo, three images show two armadillos, and two images are blank. In a sequence project, this entire group of images would be tagged as 'armadillo' with a group size of two.
Embargo
Wildlife Insights encourages users to share their data publicly, but also recognizes that data providers may want to publish their data before sharing. In these cases, Wildlife Insights provides an option to embargo a Project to keep data private for up to 48 months, after which data becomes publicly available. The embargo period is measured separately for each deployment in a project, beginning on the date the first image is uploaded into the deployment. Embargoed data will not be available to the public for the duration of the embargo period, but project metadata (e.g., project name, objectives) will be publicly available on the Explore page.
To embargo data in a project:
- Go to your Project Details page
- Enter a number of months (up to 48) in the Embargo field
- You will then be prompted with an option to authorize Wildlife Insights and Wildlife Insights Core Partners to use your embargoed data for aggregated products for peer-reviewed publications
- Click Save Changes

Note: You can view the first date your embargoed data will be released under the Embargo field.
Apply for a Project to be private
Some users may need to keep data private in order to comply with legal or cultural requirements. The following users can request an extended or indefinite embargo beyond the 48-month embargo limit by selecting the Apply for my project to be private option in the Project Details tab of the project.
- Users who belong to an Indigenous or First Nation Group
- Users who can provide a legal justification for needing to keep data private
- Users who can provide a justification for data privacy based on organizational policy
Note: Submitting a request does not guarantee that your project will be approved for an indefinite embargo.

Project Owners and Project Editors can apply for a project to be private. Once your project has submitted a request to be private, the Project Owner or Project Editor who made the request will receive an email to fill in an application for permanent privacy and you will see that in the Project Details page, the status of the request is “Request Pending”.

The submitted application will be reviewed by the Wildlife Insights support team to verify that the request meets the Wildlife Insights policies on data privacy, and will either be approved or denied. The result of this process will be communicated by email to the Project Owner who created the project and reflected in the Project Details tab.


Project privacy can be reverted at any time by the Project Owners and Project Editors by deselecting the Apply for my project to be private checkbox. Before saving your changes, you will be prompted to select a Metadata license and a Photos license and enter an Embargo period for your project.

Assign Creative Commons licenses
You can select how you want to license your data under these Creative Commons licenses:
- Images (recorded data) may be licensed under Creative Commons Zero (CC0), Creative Commons Attribution 4.0 (CC BY 4.0) or Creative Commons Attribution-NonCommercial 4.0 (CC BY-NC 4.0).
- Metadata may be licensed under Creative Commons Zero (CC0) or Creative Commons Attribution 4.0 (CC BY 4.0).
To assign a license to a project, go to your Project Details page and select the license options from the dropdown menu for the Metadata License and Photos License fields.

Delete images of humans
Wildlife Insights provides the option to delete images of humans for organizations with data privacy restrictions. If you’d like to remove images of humans from your workspaces, select the Automatically delete the photos identified with humans option in Project Details. Images of humans will be deleted only after a user has verified the identification as a human. If this option is not selected, images of humans will be visible only to Project Owners.
Learn more about how Wildlife Insights protects individuals’ privacy in Images of Humans.

Join an existing project
To join an existing project, you must have an approved Wildlife Insights user account and be invited to the project by an Project Owner or Editor. Please contact them directly.
If you would like to join an existing project, you must be invited by a Project Owner or Editor.
Invite someone to join your Project
On the Project Summary page, you can add users by selecting the green people icon button, located on the upper-right side of the screen. This will open a Users permissions box where you can invite users by entering their Wildlife Insights account email (only contributing users). You can assign five roles at the project level: Owner, Editor, Collaborator, Tagger or Viewer. There is no limit on how many roles are assigned to any project.
Remove a team member from a Project
You can remove any user from a project and revoke their access to that entity by opening the User Permissions box and selecting Revoke. When someone is removed from a project, all of the data uploaded by that user will remain in the project.
 Back to the guide